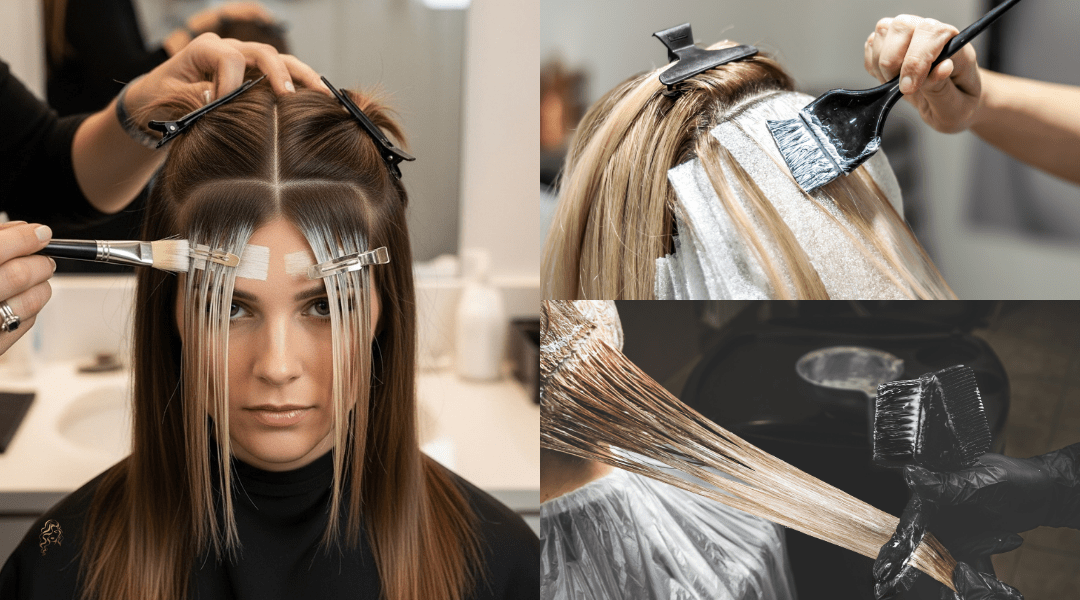
Highlights live or die by their sections. That’s why top colorists at Austin’s best salons (including ours) obsess over this crucial first step. Whether you’re a DIY warrior or just curious about professional techniques, mastering sectioning is what separates streaky misfires from that “Did you just leave the salon?” glow.
Here’s what most tutorials won’t tell you:
• Your natural part dictates everything (we’ll show you how to work with it)
• Subsection thickness changes your entire result (balayage vs. foils vs. babylights)
• The “hidden” section behind your ears that 90% of DIYers miss
We’re sharing the same precision methods our stylists use, no grad-school budgets or accidental rainbow hair required. Just pro techniques, adapted for your bathroom.
Sectioning is more than just parting hair; it’s the key to achieving vibrant, uniform highlights without the mess. Here’s why it’s critical:
Having the right tools is crucial for precise sectioning and flawless highlights. Each item plays a specific role in making the process smoother, more efficient, and professional-grade.
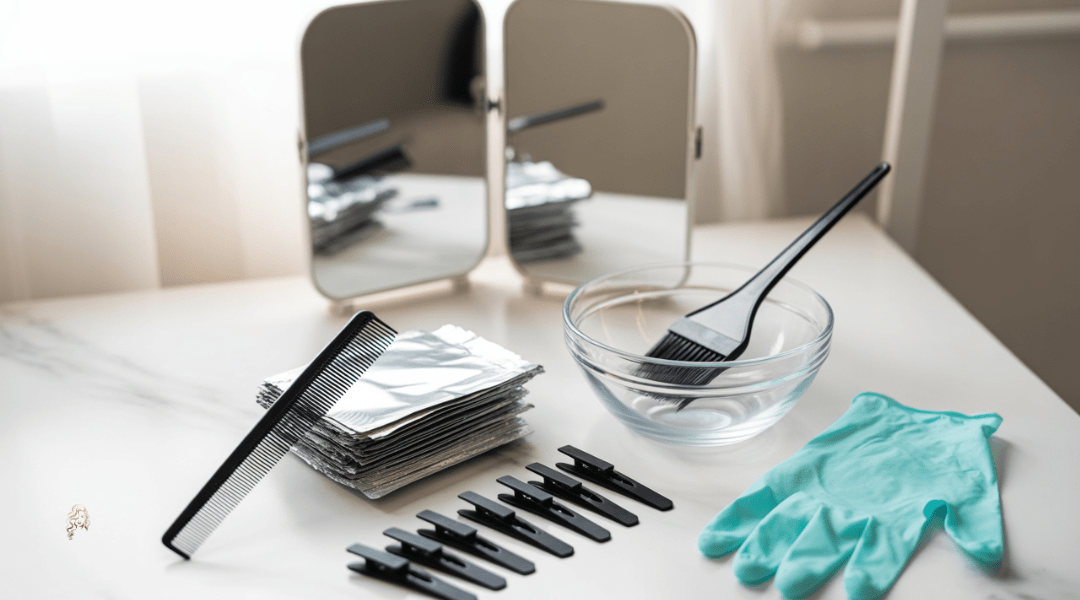
Here’s what you need, along with tips for choosing and using them effectively:
Preparation sets the stage for smooth sectioning and highlighting. Follow these steps to get ready:
Different hair types require tailored techniques. Fine hair needs thinner sections to avoid overloading with color, while thick or curly hair may require smaller subsections for control. Short hair can use fewer sections, but long hair benefits from more divisions.
Start with clean, dry, product-free hair. Buildup from oils or styling products can interfere with sectioning and color adhesion, leading to uneven results.
Work in a well-lit area with a large mirror and a second handheld mirror for back sections. Wear an old t-shirt or a salon cape and cover surfaces to protect against spills.
Test your color or bleach product on a small strand 24–48 hours before highlighting to check for allergic reactions or unexpected results, especially with new products.
Before you reach for the dye, make sure you’ve covered all the essentials. Read 14 Things to Know Before You Color Your Hair for expert tips that can help you avoid common mistakes and get salon-worthy results from the start.
Follow these steps to section your hair like a pro for flawless highlights:
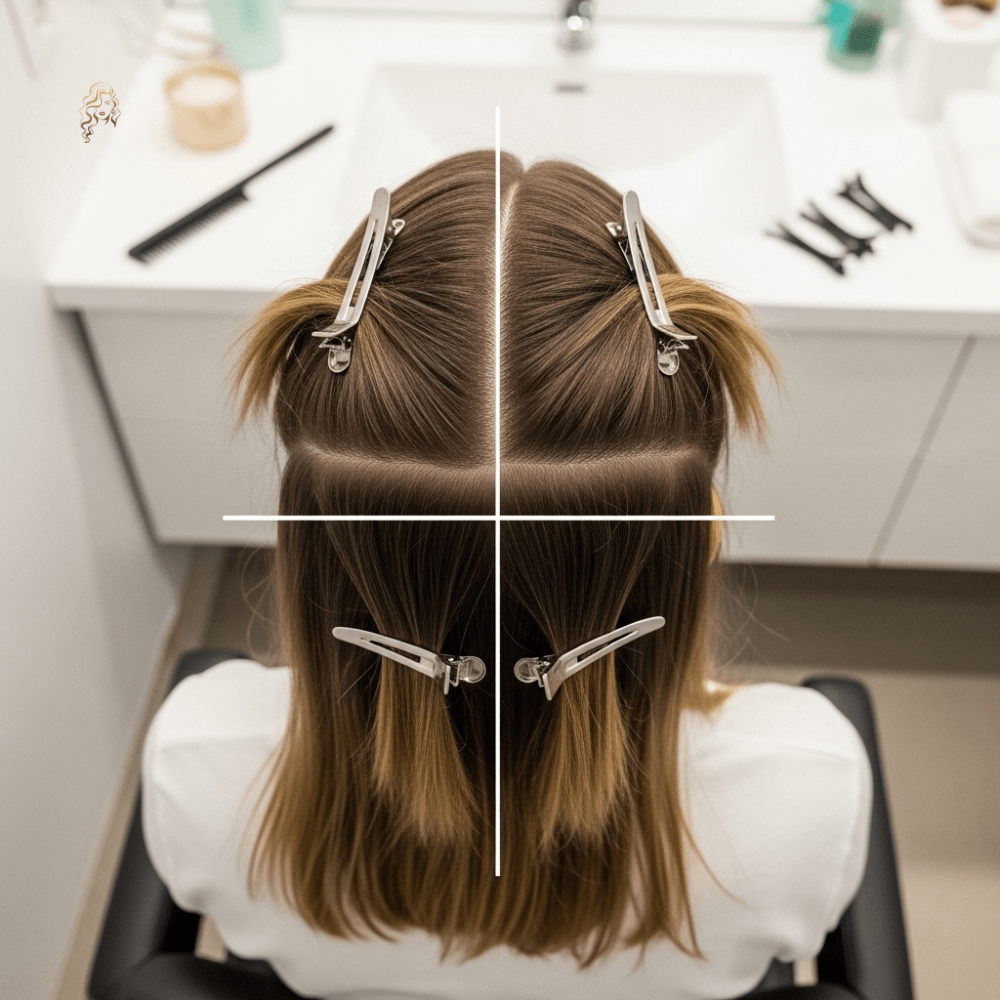
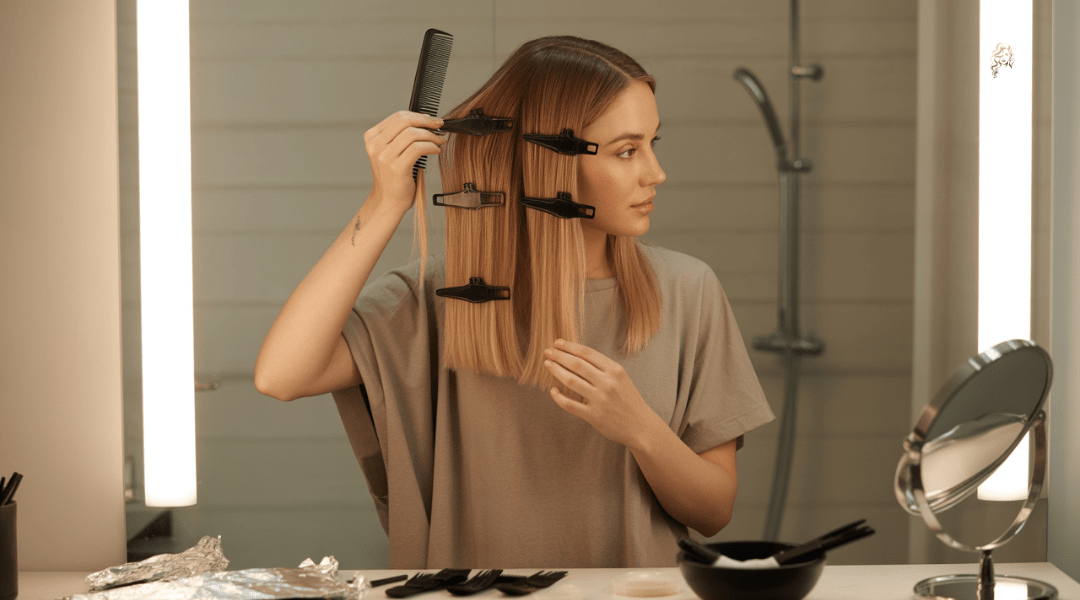
Use a rat-tail comb to divide your hair into four main sections: front left, front right, back left, and back right. Part from the center of your forehead to the nape of your neck, then horizontally from ear to ear. Secure each quadrant with alligator clips.
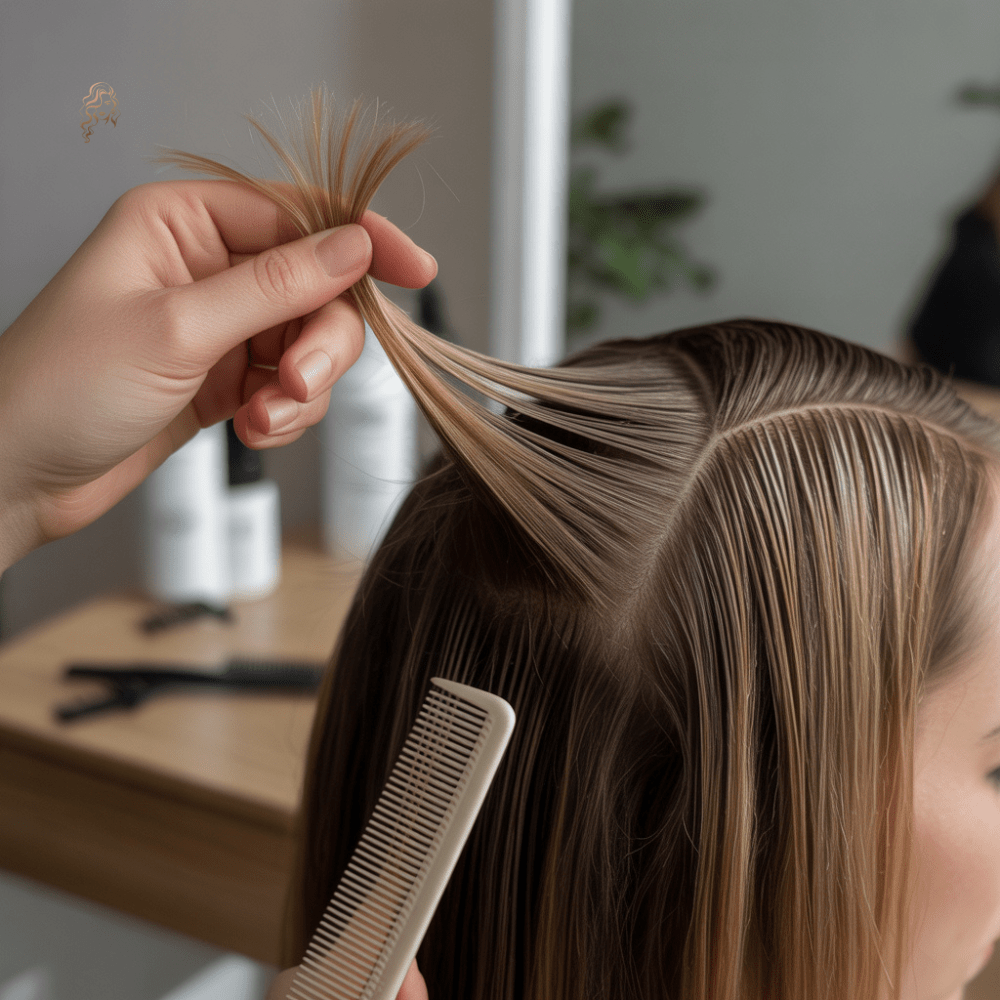
Within each quadrant, create smaller subsections (about 1/4-inch thick) for better control. For traditional highlights, use horizontal subsections; for balayage, diagonal subsections create a natural gradient. Ensure subsections are thin enough for light to pass through when held up.
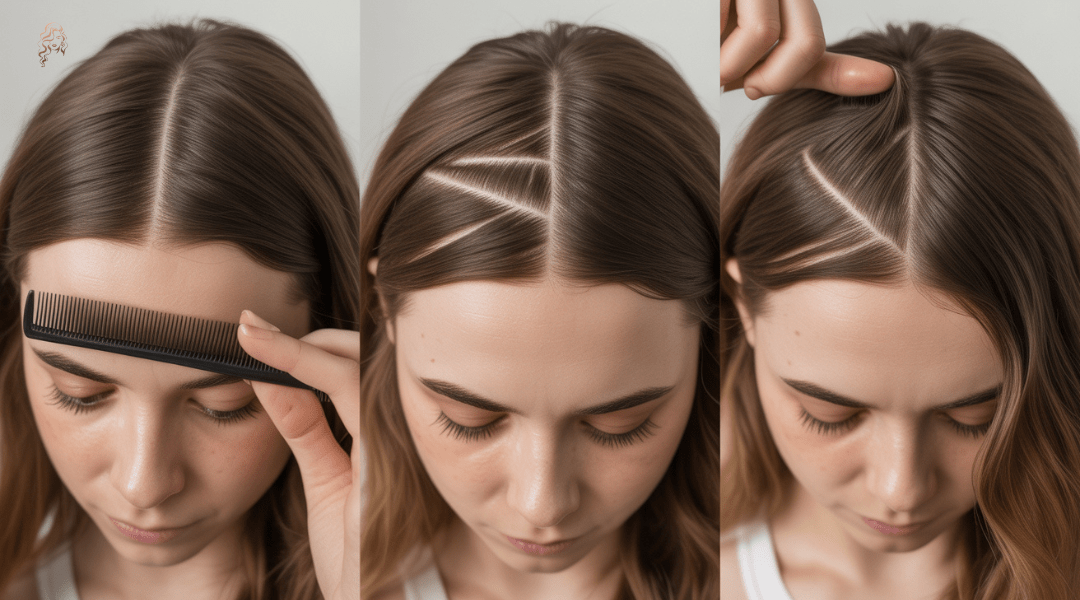
Choose a parting style based on your face shape and desired look. A middle part works for balanced highlights, a zig-zag part adds a modern twist, and a side part complements asymmetrical styles. Right-handed people may find it easier to start on the left front quadrant, and vice versa.
| Style | Best Sectioning Tip |
|---|---|
| Foil Highlights | Straight horizontal sections, tight foils |
| Balayage | Freehand painting with thicker sections |
| Babylights | Super fine subsections |
| Chunky Highlights | Wider partings with foil |
| Face-Framing Pieces | Focus on the mohawk/front line |
Avoid these pitfalls to ensure your highlights look polished:
After highlighting, protect your hair to maintain vibrant results:
Yes, but with caution. The process depends on your existing color and desired result:
???? Over permanent dye: Wait 4–6 weeks to avoid excessive damage. Use a strand test first, some dyes resist lightning.
???? Over semi-permanent color: Most fade enough for highlights, but reds/blues may require color correction.
???? Dark to light? May need multiple sessions to prevent brassiness (toner is essential).
Yes, balayage is traditionally a freehand painting technique that does not require foils. The stylist or DIY user paints the lightener directly onto the hair surface, allowing for a soft, natural gradient that mimics sun-kissed highlights.
Foils are optional in balayage and may be used to speed up processing or isolate sections for more precise lightening, especially if you want stronger contrast or faster lift. However, many prefer the foil-free method because it creates a more diffused, lived-in look with less damage.
If you’re new to balayage, practicing freehand painting on thicker sections can help you master the technique without the complexity of foil placement.
The quadrant method is ideal for beginners: divide hair into four even sections (front left/right, back left/right) using a rat-tail comb. This ensures control and prevents missed spots.
Why it work for DIY:
???? Keeps hair organized and visible while working.
???? Allows focused, one-section-at-a-time application.
???? Minimizes uneven saturation (common with freehand techniques).
Pro Tip: Clip each quadrant securely with alligator clips; slippage causes patchy results.
Sectioning the back of your hair can be challenging when working alone due to limited visibility and arm fatigue. A dual mirror setup, a large wall mirror paired with a handheld mirror, is essential for seeing the back clearly. While many people can section the back on their own with practice, assistance from a friend or stylist can improve precision and reduce strain. For solo sectioning, use clips to secure each section tightly and take your time to create clean parts. If you find it difficult to maintain neat sections or reach certain areas, asking for help is advisable to ensure even highlights and avoid patchiness.
Refresh highlights every 6–8 weeks, depending on:
???? Growth: Roots show at ~0.5”/month.
???? Tone: Brassiness appears after 3–4 weeks (use purple shampoo).
???? Damage: Overlapping bleach causes breakage. Wait at least 8 weeks between full applications.
Tip: Stagger touch-ups, redo face-framing pieces first, then full highlights quarterly.